Skip to content

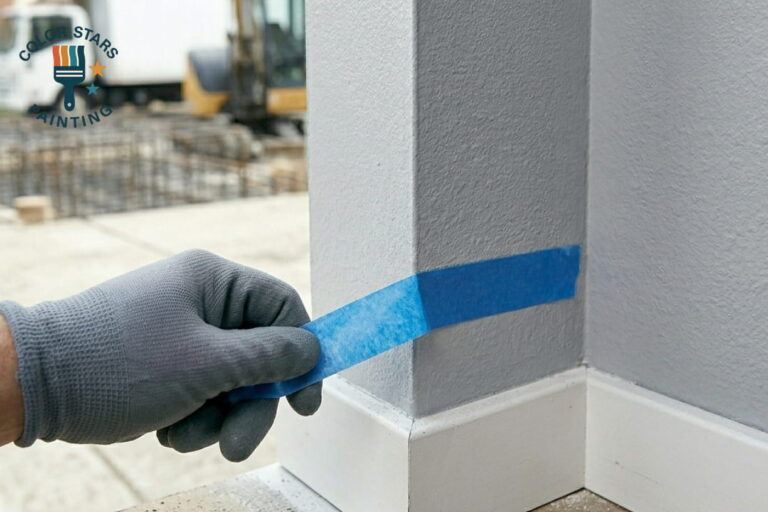
The ideal time to remove painter’s tape is when the paint is dry to the touch but hasn’t fully cured, which usually occurs between 30 and 60 minutes after the final coat. Removing the tape during this “tack-dry” phase prevents the paint from bonding to the tape and ripping away from the wall. If the tape remains on the surface until the paint is bone dry, the adhesive may pull up dried chips, leaving behind a jagged and unprofessional edge.
Choosing the right moment requires monitoring the evaporation process. When the paint no longer feels sticky but still possesses a slight internal moisture, it is flexible enough to allow a clean break from the masking material. Waiting too long leads to the formation of a continuous film over both the wall and the tape, while pulling too early causes the liquid paint to slump or bleed into the masked area. This guide explains the technical reasons behind these windows and how to manage different environmental factors.
Determining the Best Time to Remove Painter’s Tape
The chemical transition from liquid to solid determines the success of a paint job. As water or solvent evaporates, the resins in the paint begin to link together. This process creates a film that eventually hardens. According to technical guides from 3M Scotch-Blue, pulling the tape at a 45-degree angle while the paint is still in its tack-dry state ensures the cleanest possible line.
If the paint dries completely, it creates a bridge between the wall and the tape. Pulling the tape then acts like pulling a thread on a sweater; it can lift a large section of the newly applied finish. Professional standards suggest that the environment dictates the speed of this process. High humidity slows down the drying time, while warm, dry air accelerates it. Monitoring the specific conditions of the room is more effective than following a generic timer.
Challenges of Removing Tape Too Early or Too Late
Removing tape while the paint is still dripping wet leads to immediate disaster. The paint lacks the structural integrity to hold its shape, causing it to flow into the space the tape previously occupied. This results in “bleeding,” where the color creeps onto the trim or ceiling. Furthermore, wet paint on the tape is difficult to handle and often ends up smearing onto clean surfaces or the floor during disposal.
Conversely, leaving tape on for several days causes the adhesive to harden. Most standard painter’s tapes have a specific “clean removal” rating, often ranging from 14 to 60 days. However, this rating refers primarily to the adhesive’s impact on the substrate, not the paint’s ability to separate cleanly. As the paint cures, it becomes more brittle. Data from Sherwin-Williams indicates that most latex paints reach a stage of initial set within a few hours, after which the risk of peeling increases regardless of the tape’s adhesive rating.
Table of Removal Timing and Results
| Paint State | Typical Timeframe | Expected Outcome |
|---|---|---|
| Wet / Liquid | 0 to 15 minutes | High risk of bleeding and smearing |
| Tack-Dry | 30 to 90 minutes | Optimal, sharp, and crisp lines |
| Surface Dry | 2 to 4 hours | Risk of paint bridging and minor chipping |
| Fully Cured | 24+ hours | High risk of peeling; requires scoring with a blade |
Impact of Temperature and Humidity on Tape Adhesion
Environmental factors play a massive role in how adhesive behaves. In cold temperatures, the adhesive on the tape may become stiff and lose its grip, or it might become too brittle to pull away smoothly. In extreme heat, the adhesive can soften and “bake” onto the trim, leaving a sticky residue that requires chemicals to remove.
Humidity also affects the drying curve; for instance, in a damp basement, the 60-minute window might extend to three hours. Interior house painting professionals often use fans to maintain consistent airflow, which helps the paint dry evenly and keeps the tape removal schedule predictable. Without airflow, pockets of moisture can keep certain sections of the tape wetter than others, leading to inconsistent results. To mitigate temperature-related bonding, a hair dryer on a low setting can be used to slightly warm the tape, softening the adhesive and the paint film to prevent chipping.
Bonus Tip: If the tape has been on the wall for a long time or the paint is very dry, use a hair dryer on a low setting to slightly warm the tape. This softens the adhesive and the paint film, making it less likely to chip.
Things to Consider Before Making a Decision
Before deciding to pull the tape, evaluate the specific variables of the project. Not every wall or paint type reacts the same way.
- Type of Surface: Smooth surfaces, like sanded trim, allow for easier release than textured walls or brick.
- Number of Coats: Multiple layers of paint create a thicker bridge over the tape, making it harder to break the seal cleanly.
- Tape Grade: Different tapes have different adhesion levels. A high-tack tape used on a delicate surface may pull up the base coat regardless of timing.
- Paint Quality: High-resin paints often form a tougher film more quickly, shortening the removal window.
- Sun Exposure: Direct sunlight on exterior surfaces can “bake” the tape onto the substrate in a matter of hours.
Professional Techniques for Achieving Clean Lines
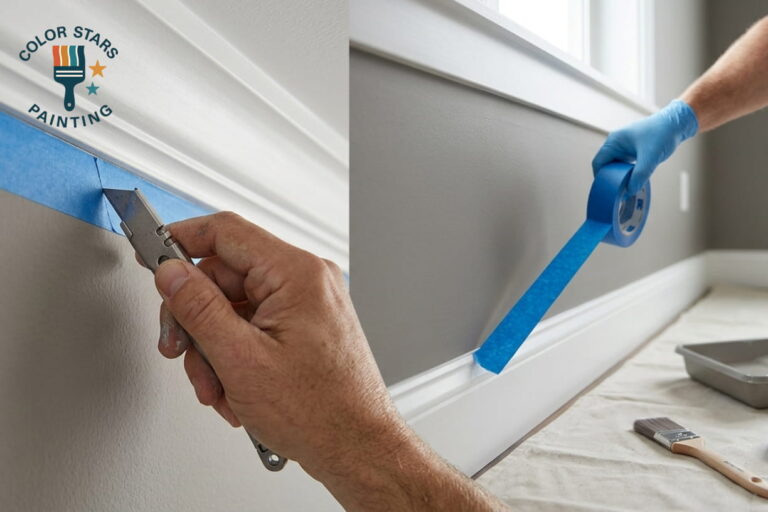
To ensure success, Color Stars Painting utilizes specific methods to manage the tape-to-paint bond. One effective technique is scoring. If the paint has dried longer than intended, take a sharp utility knife or a dedicated scoring tool and run it lightly along the edge of the tape. This cuts the “bridge” of paint, allowing the tape to come away without dragging the wall’s finish with it.
Another factor is the angle of the pull. Pulling the tape back on itself at a 180-degree angle or straight out at a 90-degree angle often leads to trouble. A steady, slow pull at a 45-degree angle provides the best leverage to cut through the paint film while keeping the tape under tension. This professional attention to detail is increasingly relevant as market trends show a rising demand for high-quality finishes. According to research by IBISWorld, the painting and wallcovering contractors industry continues to grow as homeowners prioritize these professional aesthetics.
Common Questions Regarding Tape Removal
Many people wonder if they should remove the tape between coats. Generally, if the second coat is applied within a few hours, the tape can stay. However, if there is a day-long gap between coats, it is often better to remove the tape and re-mask. This prevents the first coat from becoming too hard and difficult to cut.
Another frequent concern involves tape residue. If sticky bits remain on the trim, avoid using metal scrapers. A damp cloth with a tiny amount of rubbing alcohol or a specialized adhesive remover usually solves the problem without damaging the underlying finish. Local residential painting company standards often involve a final inspection specifically for these small imperfections.
Bonus Tip: Always pull the tape toward the unpainted area. This ensures that if any stray wet paint is on the tape, it doesn’t accidentally touch your fresh, new wall color.
Answering Your Specific Taping Questions
Should I remove painter’s tape when the paint is wet or dry?
The best time is when the paint is “tack-dry.” This means it is no longer a liquid but has not yet turned into a hard, plastic-like film. This state usually occurs about an hour after painting.
How long can I leave painter’s tape on the wall?
While many tapes claim they can stay for 14 days or more, the paint itself creates the timeline. For the best results, remove the tape within 24 hours. The longer it stays, the more likely the paint will chip during removal.
What happens if I leave the tape on too long?
The adhesive can bond permanently to the trim, or the paint can form a thick bridge over the tape. When you finally pull it, you might pull off large chunks of paint from the wall, requiring patches and touch-ups.
Does the brand of tape matter for removal timing?
Yes. Delicate surface tapes (often yellow or orange) are designed for lower adhesion and can be removed more easily from fresh base coats. Heavy-duty tapes (often green) have stronger glue and must be removed more carefully to avoid damage.
How do I fix a jagged line if the paint peeled?
If peeling occurs, let the area dry completely. Sand the edge of the peel with fine-grit sandpaper to smooth it out, then use a small artist’s brush to carefully touch up the area with paint.
Final Thoughts on Tape Management
Success in painting depends heavily on the final exit strategy. Removing tape at the 30 to 60-minute mark provides the highest probability of a sharp, professional edge. By understanding the transition from liquid to solid, anyone can avoid the common pitfalls of bleeding or peeling.
Every project presents unique challenges based on the humidity, the surface material, and the type of paint used. Evaluate the dryness of the wall by touching a small, inconspicuous area. If the paint stays in place but feels firm, proceed with the removal. Taking a slow, methodical approach and using scoring techniques when necessary will preserve the integrity of the work.
Connect with Color Stars Painting
Color Stars Painting provides expert solutions for those seeking a flawless finish on their home projects. Whether the project involves kitchen cabinet painting specialists or exterior painting contractors, the focus remains on precision and durability. For consultations regarding residential updates, contact Color Stars Painting at (512) 815-0310 or via email at Servando033087@gmail.com to discuss specific project requirements and professional standards.
Sources
- 3M Scotch-Blue – Official technical guidance on the timing and physical mechanics of removing masking tape for painting.
- Sherwin-Williams – Comprehensive instructions from a leading paint manufacturer on surface preparation and masking protocols.
- IBISWorld – Industry market research providing data on the professional painting sector and quality expectations in the US.