Skip to content

Remove painter’s tape when the paint is dry to the touch but has not yet fully cured. This window typically opens 30 to 60 minutes after the final coat is applied. Pulling the tape while the paint is still slightly pliable prevents the dried film from bonding too strongly to the adhesive, which ensures a crisp, sharp line without tearing the new finish.
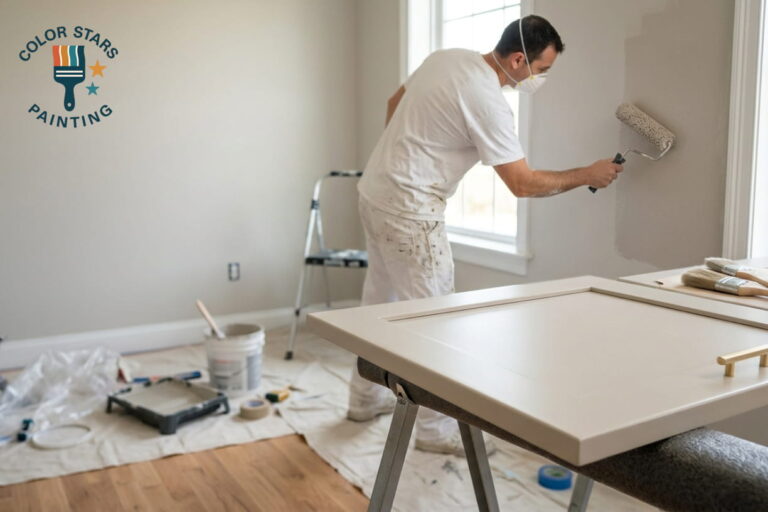
Achieving professional results requires more than just high-quality paint; it involves mastering the timing of the cleanup process. If the paint dries completely, the tape often becomes trapped under the paint film. Removing it at that stage can cause the paint to crack or peel away from the surface in jagged chunks. This guide provides a detailed breakdown of removal techniques based on environmental factors, paint types, and surface conditions. Color Stars Painting relies on these standards to deliver consistent results across all residential painting contracts.
Identifying the Best Time for Tape Removal
The most effective way to judge the timing is to test a small, inconspicuous area. Touch a section of the paint that will be covered by trim or another fixture. If the paint feels dry and does not stick to a finger, but still has a slight softness, it is ready. Waiting for a full 24-hour cure cycle is a common mistake that leads to frustration.
As noted in a guide by The Spruce, this one-hour timeframe allows the paint to set enough so it does not run, while remaining flexible enough to break cleanly at the tape line.
Differences in Paint Chemistry
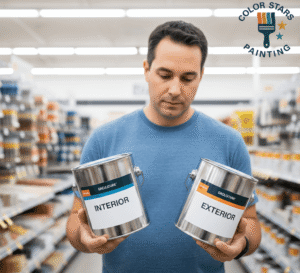
Different types of paint have varying drying times. Professional interior painters often use latex or acrylic paints, which dry much faster than oil-based alternatives.
- Water-Based Paints: These dry through evaporation and usually reach the “dry to touch” phase within an hour.
- Oil-Based Paints: These dry through oxidation and take much longer, sometimes requiring four to six hours before the tape should be moved.
- Cabinet Enamels: Used by kitchen cabinet painting experts, these specialized coatings often have quick-dry additives, narrowing the removal window significantly.
Removal Timing Based on Project Variables
| Surface Type | Paint Type | Recommended Removal Time |
| Smooth Drywall | Latex / Acrylic | 30 to 90 minutes after the last coat |
| Textured Walls | Latex / Acrylic | 30 to 60 minutes (requires scoring) |
| Wood Trim | Oil-Based Enamel | 3 to 5 hours after the last coat |
| Kitchen Cabinets | Urethane Alkyd | 1 to 2 hours after the last coat |
| Exterior Siding | Exterior Acrylic | 30 to 45 minutes (avoid direct sun) |
Professional Techniques for Sharp Paint Lines
The method of removal is just as important as the timing. Simply ripping the tape off quickly will almost always result in a jagged edge or damage to the underlying surface.
The Angle of Removal
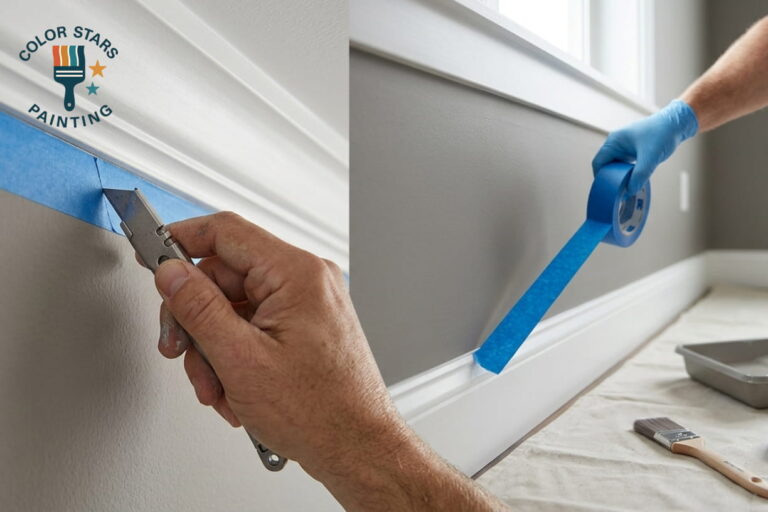
Pull the tape back on itself at a 45-degree angle. This technique creates a shearing action that cuts through the paint film rather than pulling it up. Detailed instructions from ScotchBrand suggest a slow, steady motion. If the tape starts to sliver or tear, slow down even further.
Scoring the Edge
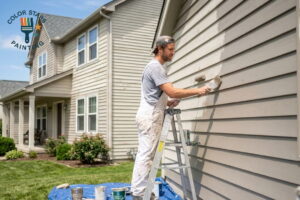
If the paint has dried completely, do not pull the tape immediately. Use a sharp utility knife or a razor blade to lightly score the edge where the tape meets the wall. This breaks the bond between the paint on the tape and the paint on the wall. This step is essential for exterior house painting services, where wind and sun might dry the paint faster than expected.
Bonus Tip: Keep a clean, damp rag nearby. If a small amount of paint seeps under the tape, wipe it away immediately after removal while it is still fresh.
Environmental Factors That Affect Adhesion
Weather and indoor climate change how tape behaves. High humidity slows down the drying process, extending the window for removal. Conversely, low humidity or high heat causes paint to skin over rapidly.
Impact of Temperature and Sunlight
Never leave painter’s tape in direct sunlight for extended periods. The heat can bake the adhesive into the surface, making it nearly impossible to remove without leaving a sticky residue. While Grand View Research tracks the evolution of high-performance coatings, no amount of chemical engineering can overcome the permanent bonding that occurs when adhesive is baked onto a surface.
Humidity and Moisture
In damp environments, the tape backing may soften. This leads to the tape tearing into small strips during removal. If the room is particularly humid, consider using a dehumidifier or waiting for a drier day to ensure the tape maintains its structural integrity.
Things to Consider Before Making a Decision
Before applying tape or deciding when to pull it, evaluate these factors to ensure the best outcome for the project.
- The Age of the Tape: Old tape becomes brittle. If the roll has been sitting in a garage for years, the adhesive might have degraded, leading to poor performance.
- Surface Texture: Highly textured surfaces, like orange peel or knockdown walls, allow paint to bleed under the tape. These surfaces usually require a “seal the edge” technique with a small amount of the base color before applying the top coat.
- Adhesion Level: Not all tapes are the same. Blue tape is generally for multi-surface use, while green tape often has higher adhesion for exterior work. Purple or delicate surface tape is necessary for freshly cured paint or wallpaper.
- Number of Coats: If the project requires three or more coats, the paint layer becomes thick. This thickness makes scoring the edge mandatory rather than optional.
Dealing with Tape Residue and Failures
Sometimes, despite following all steps, the tape leaves behind a sticky film or pulls up the old paint. This often happens if the tape was left on for several days or weeks.
Removing Adhesive Residue
If residue remains, avoid using harsh chemicals that might dissolve the new paint. A mild soap and water solution or a specialized adhesive remover applied to a cloth can often lift the stickiness. Always test the cleaner on a hidden spot first.
Fixing Peeled Sections
If the tape pulls up a section of the new paint, the area must be repaired. Lightly sand the edges of the “crater” to smooth them out, apply a tiny amount of spackle if the dip is deep, and then dab on a small amount of matching paint with a foam brush to blend it in.
Bonus Tip: For the sharpest possible lines on trim, apply a very thin bead of paintable caulk over the tape edge and wipe it flat before painting. This creates a physical barrier that prevents any seepage.
Common Questions About Painter’s Tape
To further assist with the process, here are some of the most common questions regarding the use of painter’s tape.
Many homeowners wonder if they should remove tape between coats. Generally, it is better to leave the tape in place until the final coat is applied, provided the total time does not exceed the tape’s rated limit (usually 14 to 60 days). However, if the paint is applied very thickly, removing and re-taping between coats can prevent a heavy bridge of paint from forming over the tape.
Another frequent concern is whether to pull the tape toward the painted side or away from it. Always pull the tape away from the freshly painted edge. This ensures that any accidental drips or strings of paint on the tape do not fall onto the clean wall.
Expert Advice for Specific Projects
Different areas of the home require specialized approaches. Professional interior painters treat a bathroom differently from a living room due to moisture levels.
- Kitchens and Bathrooms: High-gloss paints used in these rooms are more prone to “bridging” over the tape. Scoring the edge is almost always necessary here.
- Ceilings: When taping off a ceiling, gravity is the enemy. Ensure the tape is pressed firmly with a putty knife to prevent the paint from running down behind the adhesive.
- Exterior Surfaces: Wood siding or brick requires tape with high adhesion. Because these surfaces are uneven, removing the tape sooner rather than later is best to catch any bleeds while they are wet.
Solutions for Removal Problems
Why is my tape tearing into small pieces?
This usually happens because the tape is too thin or has been left on too long. It can also occur if the paint has dried and bonded the tape to the wall. Use a heat gun on a very low setting to slightly soften the adhesive before pulling.
How do I get a straight line on a popcorn ceiling?
Taping a popcorn ceiling is difficult. Many professionals use a screwdriver to scrape away a tiny channel of the texture along the wall line. This creates a flat surface where the tape can sit flush, preventing the jagged “bleed” common with textured ceilings.
Can I leave tape on for a week?
Check the packaging of the specific product. Most premium painter’s tapes are rated for 14, 30, or even 60 days. However, the longer it stays, the harder it is to remove cleanly. Color Stars Painting recommends removing it as soon as the job is done to avoid any potential complications with the adhesive.
What if the paint is still wet when I remove the tape?
If the paint is too wet, it may slump or run into the area you were trying to protect. If you see the paint “moving” as you pull the tape, stop and wait another 15 minutes.
Summary of Key Takeaways
The secret to clean lines is a combination of quality materials and precise timing. Remove the tape when the paint is dry to the touch, generally about an hour after the last coat. Pull at a 45-degree angle and move slowly. If the paint has hardened, use a razor to cut the bond. Environmental factors like heat and humidity will change your timeline, so always monitor the drying progress manually.
Evaluate the surface texture and the type of paint being used before starting. Residential painting contractors often use specific tapes for specific surfaces to avoid damage. By following these steps, the finished product will have the crisp, professional look that defines high-quality workmanship.
Contact Color Stars Painting for Your Next Project
Professional results require attention to detail at every stage of the process. For those looking for expert assistance with residential painting contractors, Color Stars Painting provides high-quality solutions for all interior and exterior needs. Whether you require kitchen cabinet painting experts or exterior house painting services, the team is ready to help. Reach out via email at Servando033087@gmail.com or call (512) 815-0310 to discuss your upcoming project and ensure a flawless finish for your home.
Sources
- The Spruce – A comprehensive guide on the timing and mechanical process of removing painter’s tape.
- ScotchBrand – Manufacturer instructions for optimal removal angles and surface preparation.
- Grand View Research – Market data regarding the prevalence and drying characteristics of modern water-based coatings.
- Sherwin-Williams – Professional painting standards for taping and protecting surfaces during renovation.